Week 1 (08/01/13 - 09/01/13)
08/01/13 Tuesday
On this day we got an introduction to the course and learned the 12 principles of Animation. Here are the notes I took:
12 principles of animation:
Squash and Stretch
Weight (timing and spacing)
Secondary animation
Exaggeration
Arcs
Slow In and Out
Appeal
Follow through and Overlapping Action
Solid Drawing (in 3D, don't squash size to squash and stretch)
Staging
Straight ahead action, pose to pose.
---
(Practise first TIMING AND SPACING)
Timing is how long something takes between A to B. (Timing is when there is a change of direction)
Spacing is what happens in between. Where they overlap is the spacing.
If doing a ball sequence, think about the following:
+ What is the material of ball?
+ What is the height of the ball (how high you are dropping from)?
+ What is the surface the ball is bouncing on?
Think about what type of ball you want to animate. A football? A Basketball? A tennis ball?
--
In blog:
Vid referencing
--
Ease out at beginning, Ease in at end.
Ease out of pose, ease in to pose.
--
Pose annimation
+ Key drawing is indicated by a full circle around a number.
+ A number on its own is an in-between.
Straight Ahead
+ Drawing frame after frame.
--
Arcs
+ Everything has an element of arcs. The better the arcs, the smoother the animation.
+ Avoid sharp arcs.
+ When you move anything, think about the arcs. Nothing is ever in straight lines.
--
Anticipation
+ Action before main action. Telling the audience what you are going to do.
+ Setting up the action befre it actually happens.
+ Going in the opposite direction of the direction you are about to go in.
--
Follow Through
+ The action after principle action. Opposite of anticipation.
+ Completing the arc.
Overlap
+ The extra parts (like hair or clothing) that follows after all the character action. (Superman lands in a standing position and his cape follows and billows behind him.)
--
Secondary Animation
+ Limb movements that help portray the main action. (Main action: Hitting tennis ball like swinging arms and body. Secondary action: Facial expression/Wrist movement)
+ Blinking, scratching head, slight movements are all secondary actions.
--
Appeal
+ Making an aesthically and emotionally appealing character.
+ Make the character suit its personality, but make sure it is appealing to an audience.
+ Emotionally connecting characters.
--
Staging
+ How you frame your characters (the composition)
+ Use reference to help with staging.
09/01/13 Wednesday
Maya Training
Today we started to learn the very basics of Maya. Here are a few things we looked over:
+ We also learnt how to set a project:
File --> Project Window --> Press 'New' --> Set file directory to own path
(It is always best to name a file '_001' for example as Maya prefers underscores and the 001 acts as padding.)
In order to save you can go to
File --> Save Scene As
(It should be set to the scenes folder.
+ The Grid
Display --> Grid (options)
+ Key shortcuts
+ Settings to keep (In preferences)
Animation = Auto Tangents
Undo = Infinite
Time Slider = Real-time 24fps
Settings = 24fps
+ Timeline
+ Graph Editor
Today we started to learn the very basics of Maya. Here are a few things we looked over:
- To create a sphere you can go create --> Polygon Primitives --> Sphere
- The cube in the corner is called the view cube.
- To change colours of Maya go to window --> settings/preferences --> colour settings
- To change the actual properties of the sphere divisions go to Channel Box --> Polysphere1 --> Subdivision Axis/Height
+ We also learnt how to set a project:
File --> Project Window --> Press 'New' --> Set file directory to own path
(It is always best to name a file '_001' for example as Maya prefers underscores and the 001 acts as padding.)
In order to save you can go to
File --> Save Scene As
(It should be set to the scenes folder.
+ The Grid
Display --> Grid (options)
- One unit is one square on the grid.
- Perpective Grid Numbers: Shows numbers of the axes.
- Orthographic Grid numbers: Default setting and shows no numbers on the grid.
+ Key shortcuts
- To make the arrows on your component longer so it makes it easier to adjust, use the + or - keys.
- Pressing A keeps all objects in scene.
- Pressing F keeps seleted object in scene.
- Pressing 4 keeps the wire view of objects.
- Pressing 5 keeps non wire view of objects.
- Pressing 6 keeps textured view of objects.
+ Settings to keep (In preferences)
Animation = Auto Tangents
Undo = Infinite
Time Slider = Real-time 24fps
Settings = 24fps
+ Timeline
- Press S whilst on one of the numbers on the timeline to keyframe.
- Holding shift and dragging across the timeline highlights it so you can either move or extend it.
- To delete a frame, right-click and delete. Or go into the graph editor and highlight keyframe you want to delete and delete.
+ Graph Editor
- Windows --> Animation Editors --> Graph Editor
- In order to only animate the axis that you want, go to channel box/layer editor and right-click and select lock selected. For example: Channel Box --> Right-click 'Scale x' --> Lock Selected (Scale x should now be greyed out.)
Experimenting:
Intro to experiments and what i had to do.
Video References:
I used a few video references to help my bouncing ball tests. I made my own bouncing ball reference video (below) with a bouncy ball (which was very bouncy) and a tennis ball (not as bouncy).
|
Above:
Below: Ping Pong ball reference. This video shows how bouncy the ping pong is and how quick and how many bounces it actually makes. |
Above: Bowling Ball bouncing. As you can see, the bowling ball bounces very little before stopping as it is extremely heavy.
Below: Balloon bouncing. Because the balloon is so light, the actual bounce of it is really slow and steady. Everything is slow motion it seems. |
Bouncing Ball Test
|
|
|
Here are my first bouncing ball tests. This was my first animation in Maya. Here are the heavy and light balls. The heavy ball was easy enough to do as it had little bounce, but when it came to the lighter ball, for some reason I was finding it difficult, even with the reference, to plan out. The timing and spacing for both of there were rather awkward and didn't work too well.
Below, I redid the ball bounces, and utilised more of the graph editor and changed the timing and spacing a bit to get a better bounce. Also we were shown how to create anticipation, so I added a bit at the beginning where the ball looks like it goes back and then forward into the bounce. I still had trouble with the light ball bounce and just couldn't get it to look right.
Below, I redid the ball bounces, and utilised more of the graph editor and changed the timing and spacing a bit to get a better bounce. Also we were shown how to create anticipation, so I added a bit at the beginning where the ball looks like it goes back and then forward into the bounce. I still had trouble with the light ball bounce and just couldn't get it to look right.
|
|
|
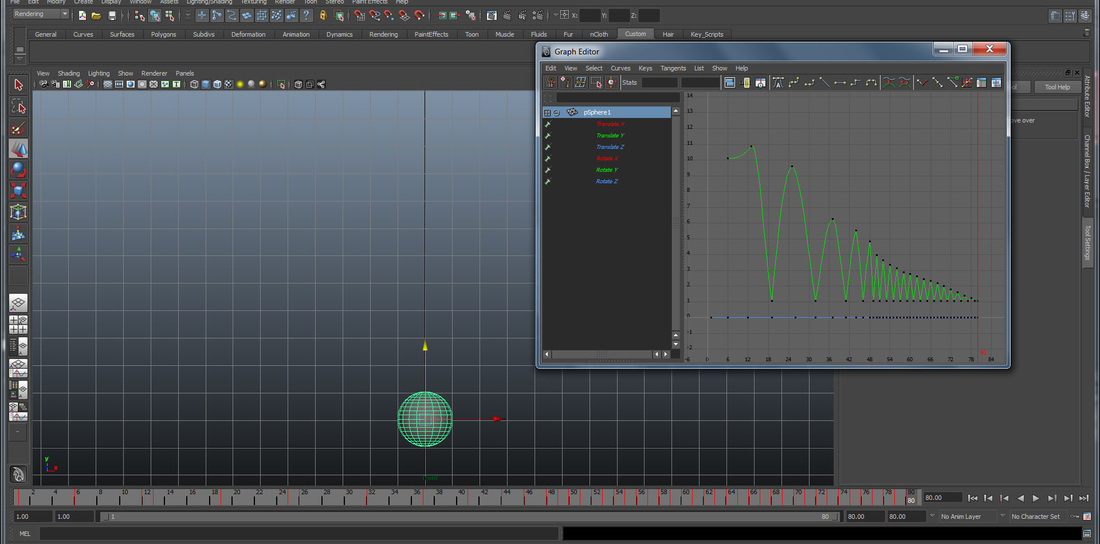
I tried to do the light ball again, but still the timing and spacing is off. Especially at the end as you can see on the graph editor above. The bounces at the end are too quick and together, so the bounce looks awkward as it gets halfway.
WEEK 2 (15/01/13 - 16/01/13 - 17/01/13)
15/01/13 Tuesday
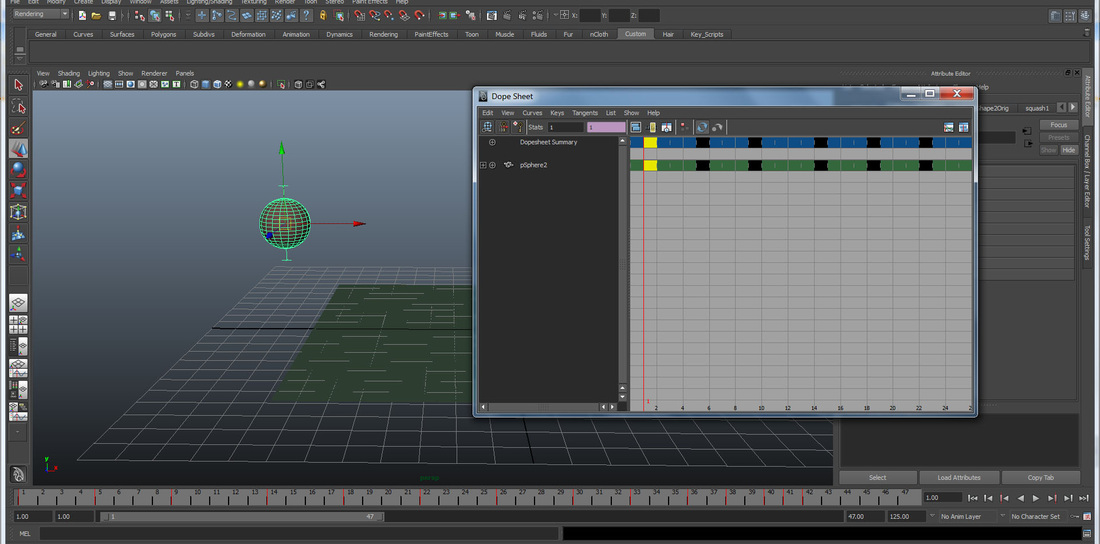
Continuing on from our previous Maya lesson, we learnt more about keyframes in timeline.
+ Moving Pivot Points:
-------------
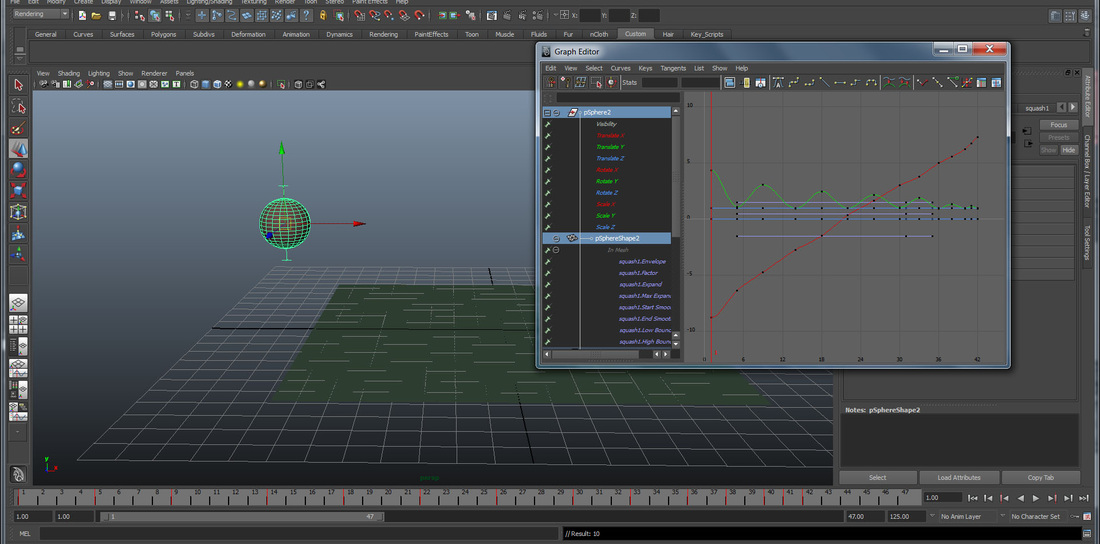
+ Squash and Stretch
Today we also learnt how to squash the ball.
Make sure to be under the Animation sub menu
+Parenting
So that the squash follows the ball. Click on the line that crosses the ball then hold shift and click on the ball. Then press P. Squash and move should all be in green now.
+ Onion Skin
Animate --> Ghost Selected/Unghost Selected
- Move all keyframes in timeling, hold shift and select all frames. Using the middle arrows, move access where you want.
- To snap the keyframes go to either dope sheet or graph editor then go to edit then snap:
- Windows --> Animation Editors -->Dope Sheet/Graph Editors (highlight all frames) --> Edit --> Snap
+ Moving Pivot Points:
- Press insert or D to adjust the pivot point
- To snap pivot point: Insert --> hold V --> middle mouse click close to the middle of object
-------------
+ Squash and Stretch
Today we also learnt how to squash the ball.
Make sure to be under the Animation sub menu
- Channel box --> Squash Input --> highlight Factor --> middle-click anywhere on screen and move left to right to adjust the squash.
+Parenting
So that the squash follows the ball. Click on the line that crosses the ball then hold shift and click on the ball. Then press P. Squash and move should all be in green now.
+ Onion Skin
Animate --> Ghost Selected/Unghost Selected
Here we were learnt about the squash and stretch of the ball. I started off by just manipulating the basic squash of it, then I applied it further to the bounce. So as the ball touches the ground it squashes horizontally, then as it goes up and reaches the top of the arc, the ball stretches vertically. Just by squashing, the ball becomes a bit more alive and the bounce becomes more interesting and believable.
Below I started working on sending the ball bouncing across the screen. I utilised the dope sheet and graph editor to manipulate timing and spacing as well as to check if the arcs worked out well. As you can see on the graph editor, the arcs slowly get smaller.
Below I started working on sending the ball bouncing across the screen. I utilised the dope sheet and graph editor to manipulate timing and spacing as well as to check if the arcs worked out well. As you can see on the graph editor, the arcs slowly get smaller.
Below are the actual tests of the ball going across. I then added squash to the ball to make it look more effective as it bounces across the floor.
WEEK 3 (22/01/13 - 24/01/13)
22/01/13 Tuesday
Today we used video references to place behind the scene and animate over. We used After Effects to change the change the video into tiff files to import into Maya.
+ After Effects
+ Maya
+ After Effects
- In AE, import the video you want into a scene, cut the part you need and 'add to render queue'. After, edit the settings so it exports as a TIFF (or Targa) file.
+ Maya
- To import into Maya: File --> View Sequence --> F Check (Wait til the fcheck box goes through the whole vid) --> File --> Save Animation (Make sure they are all in one file)
- Then go to: View --> Image Plane --> Import Image (from the place you saved your fchecked files)
We also learned about texturing
+ Texturing
+ Texturing
- Right-click --> assign new material
- Window --> render editor --> hypershade --> click on texture --> click on that checkered box next to colours --> ramp
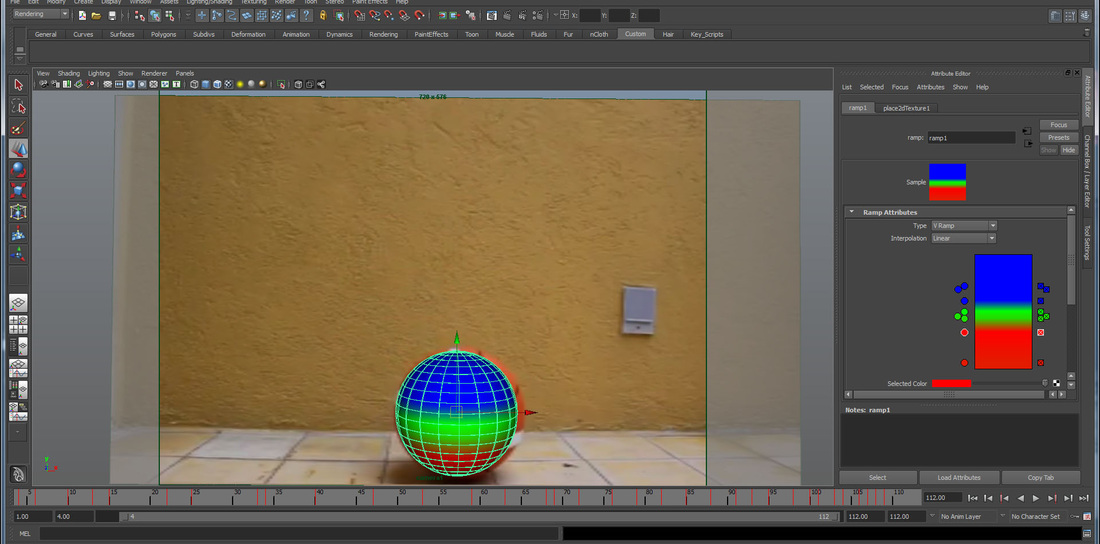
Above are my tests for the ball over a video reference. We had to put the actual video into after effects to make it into tiff sequences. Then we imported the sequence into Maya to actually animate over it. The actual bounce of the ball was easy to follow, but I found it quite difficult just trying to get the rotation of the ball on point as it turns in the actual video. We we then taught how to put a texture over it and used 'ramp' to adjust the three colours of the ball. This was a really handy lesson so if I needed to add video reference in Maya, I know how to do it.
Evaluation
At first, I thought Maya was going to be a really difficult and confusing program to get to grips with, however as I started to get more and more training and I did more experimenting, I found that it was easier and much more fun than I thought. I think on this first part I did okay, but I realise that looking back on these weeks that my ball tests weren't that great. I plan to work much more on my spacing and timing. I found animating on top of the vid reference really helpful.
