Final Lipsync Project
For this final project, we have to make an animation that focuses on character animation and specifically lipsyncing using the Morpheus rig.
I decided to pick this clip below from the film 17 again. I immediately thought of this clip when we were given the project brief. It may have been because I watched it recently, but also because this was a funny, but sweet scene. It wasn't too ridiculous a scene and I liked that fact, also, it was just one persons dialogue which had enough to work with to look good in animated form. In the scene, he is going on about abstinence and finally trails off in his own sentimental rant as he remembers his child being born. I thought the clip had a good pacing as he gets slower and quieter by the end.
I decided to pick this clip below from the film 17 again. I immediately thought of this clip when we were given the project brief. It may have been because I watched it recently, but also because this was a funny, but sweet scene. It wasn't too ridiculous a scene and I liked that fact, also, it was just one persons dialogue which had enough to work with to look good in animated form. In the scene, he is going on about abstinence and finally trails off in his own sentimental rant as he remembers his child being born. I thought the clip had a good pacing as he gets slower and quieter by the end.
Storyboarding
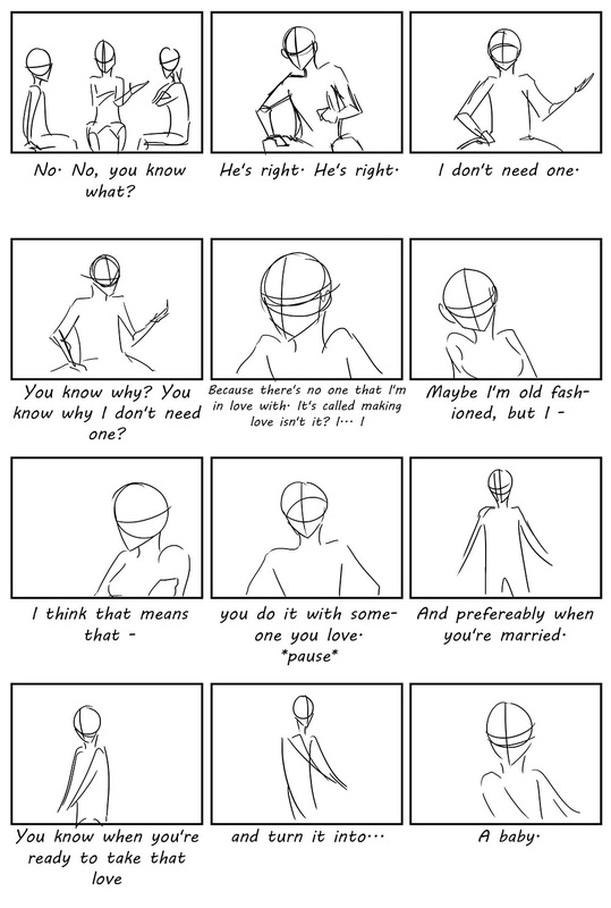
Here are some of my storyboards that I did for the lipsync.
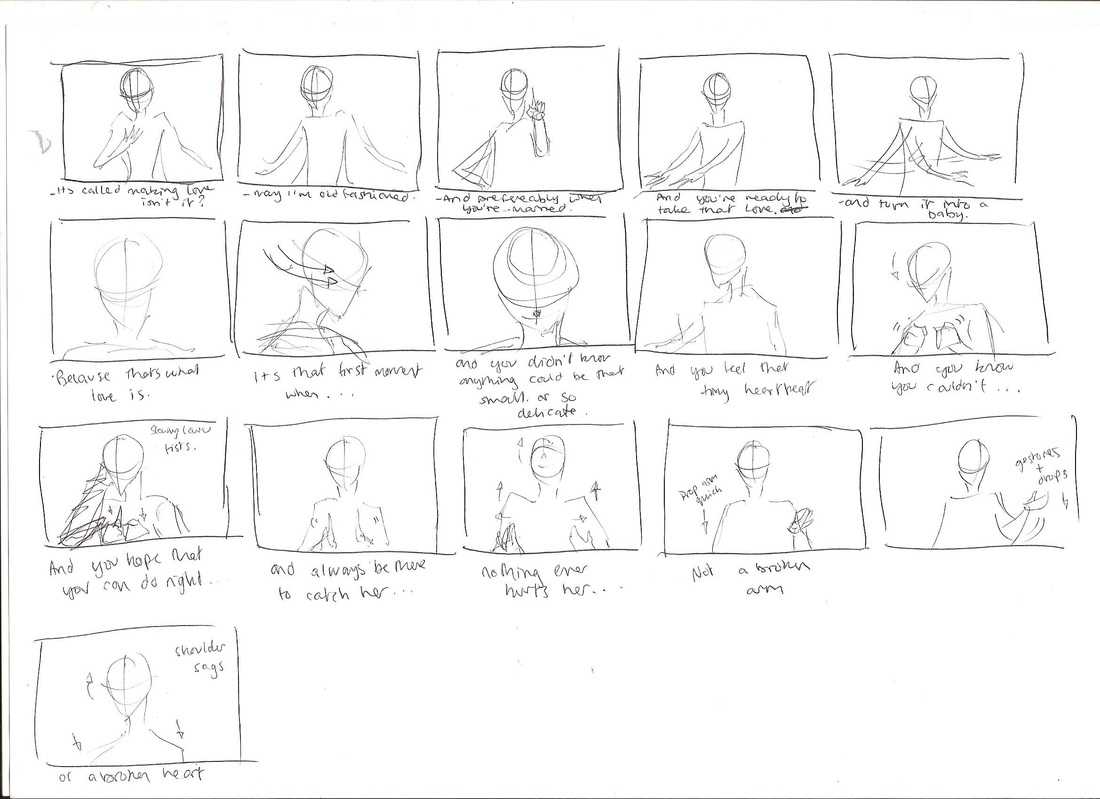
Above: This is my really sketchy storyboard test. It is just figuring out some of the angles. I didn't feel as if a full body shot was required for my piece because the actual scene has a quite intimate feel as he is talking about something quite 'special' (babies). I wanted to focus more on his facial movements and hand gestures.
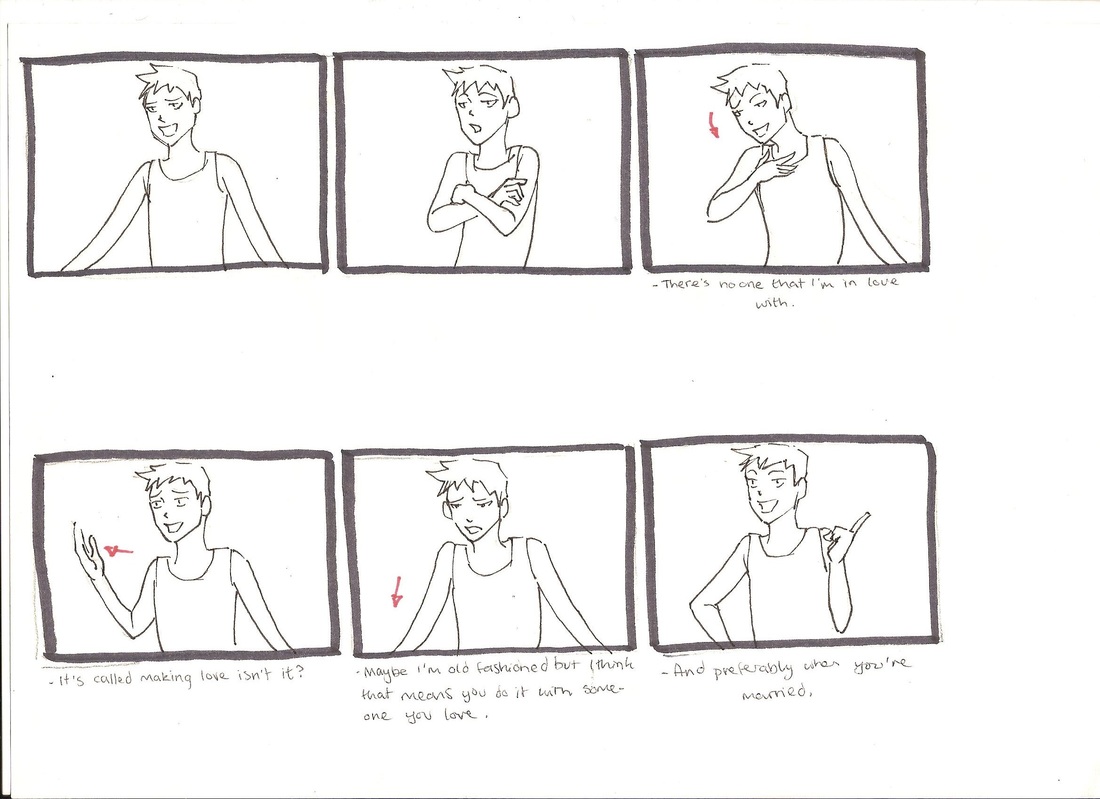
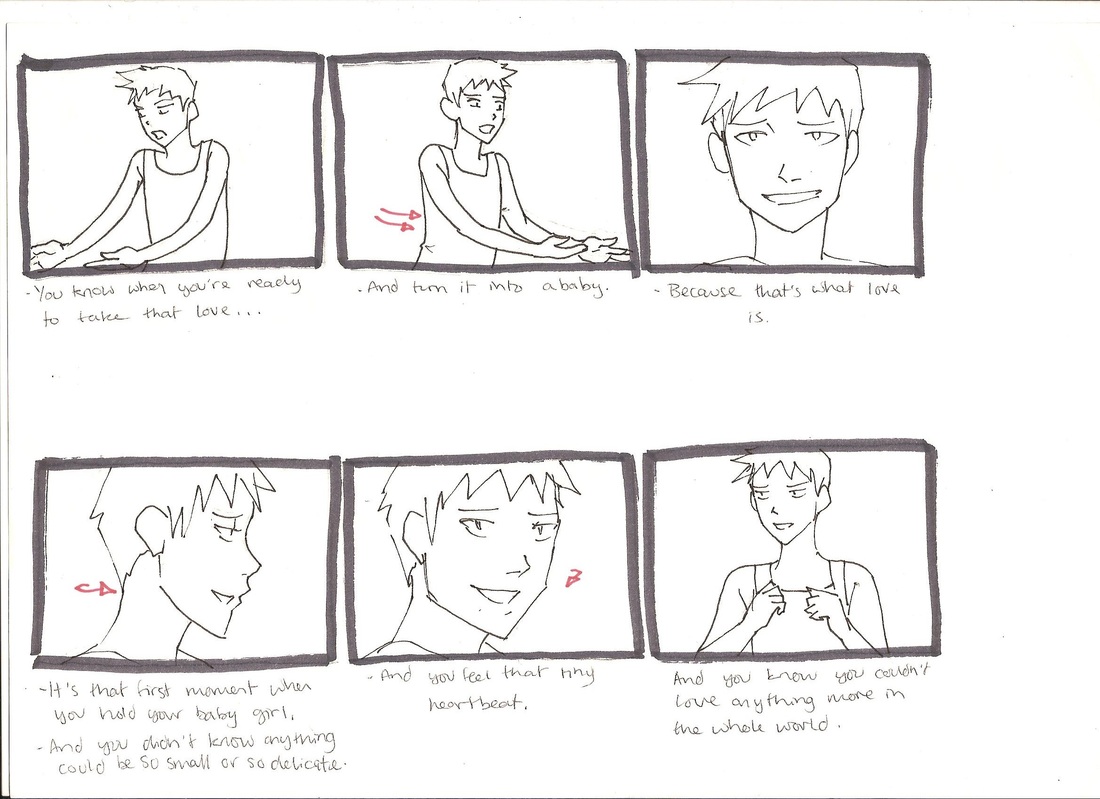
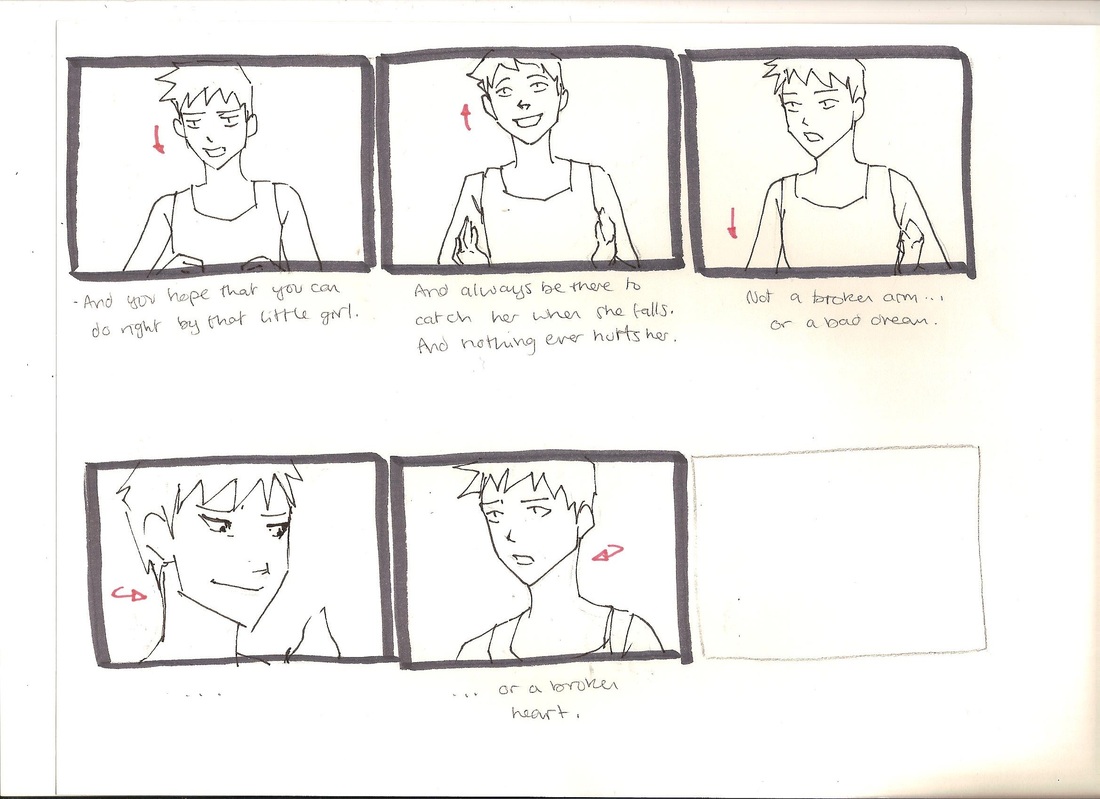
Below: This is a slightly better storyboard where you can see the movement clearer. I've changed a few things as I found it suited it better.
Below: This is a slightly better storyboard where you can see the movement clearer. I've changed a few things as I found it suited it better.
Below: The last 2 panels will probably be changed as it is confusing.
Animatic
Here I put the storyboard images together to get the timing. There might be a few more changes before the final animation is completed, but that can be changed throughout.
Morpheus Rig
(PLEASE SEE 'MORPHEUS RIG AND TESTS' PAGE FOR 'YOU FEELIN ALRIGHT THERE, PHIL?' LIPSYNC)
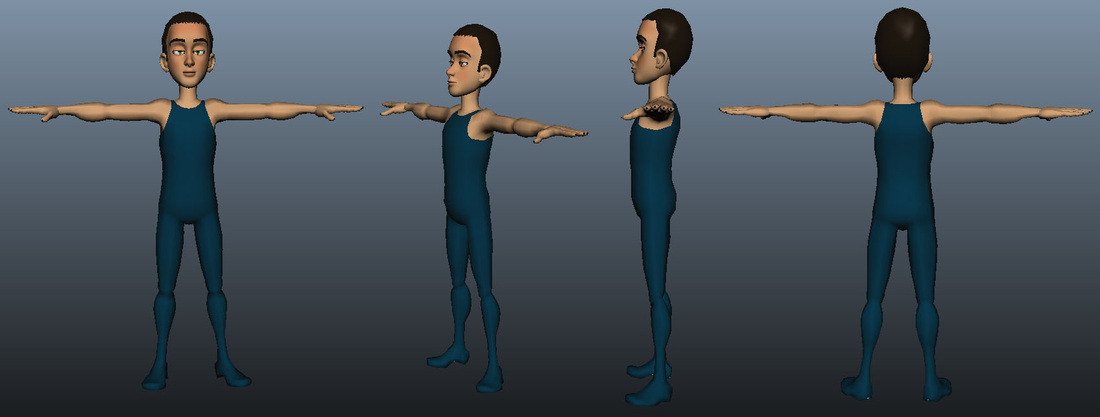
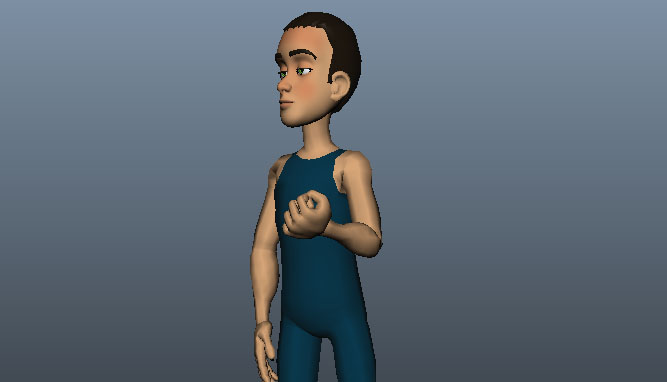
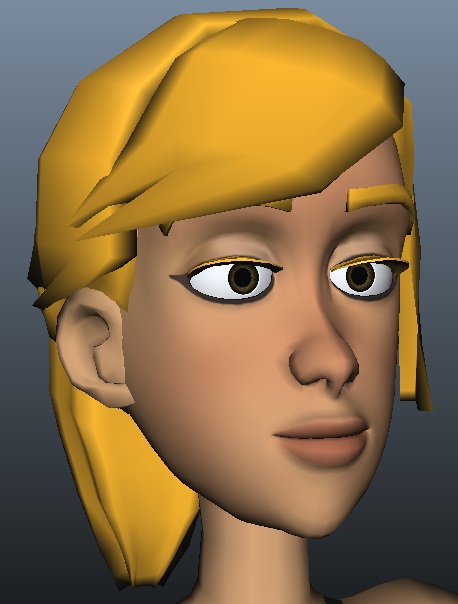
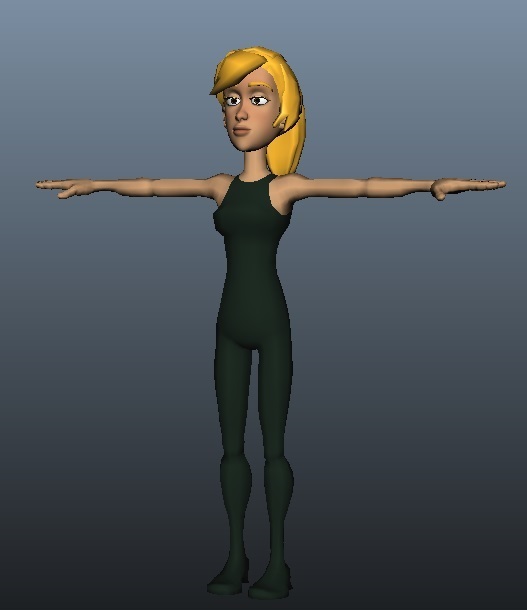
We were given the morpheus rig (as seen on my morpheus rig page) and were to use this for our animation. I changed the morpheus character and gave him a little more meat, changed his hair, eyes and skin colour as well as his clothes.
I kept the character as a young boy, but wanted to veer off from the 'Zac Efron' look of the real scene so I made an opposite character, but keeping the young quality.
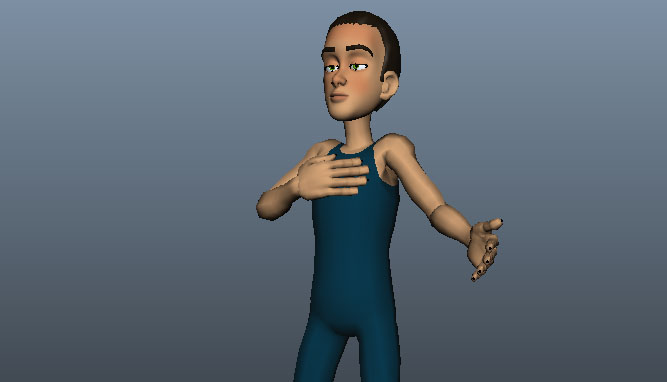
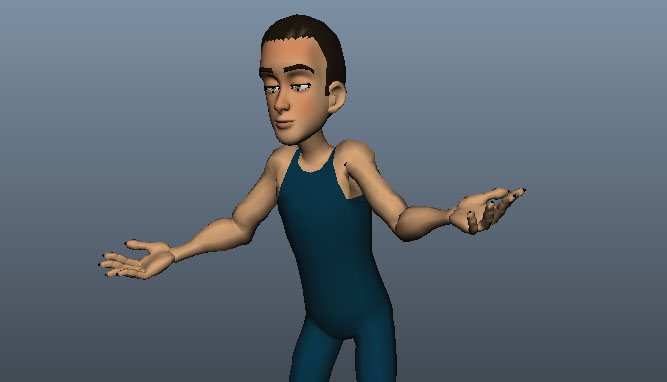
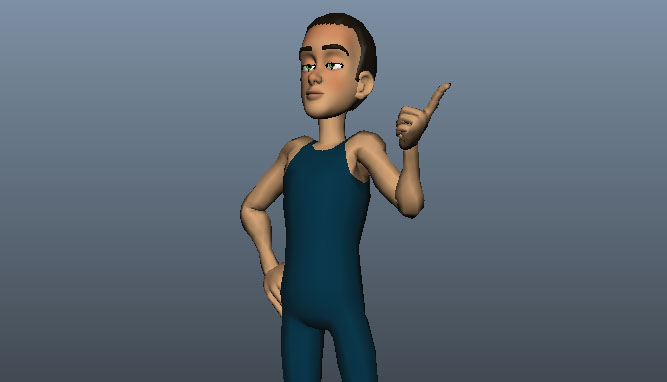
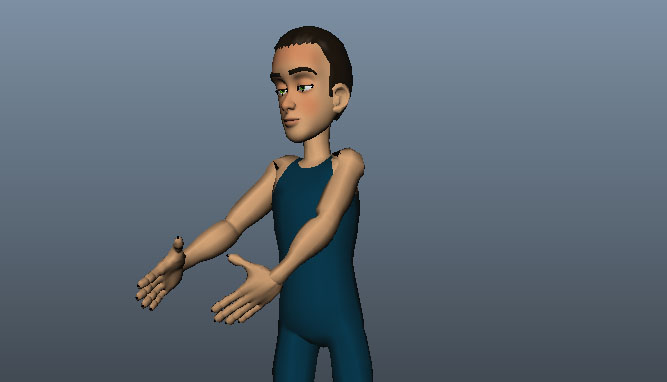
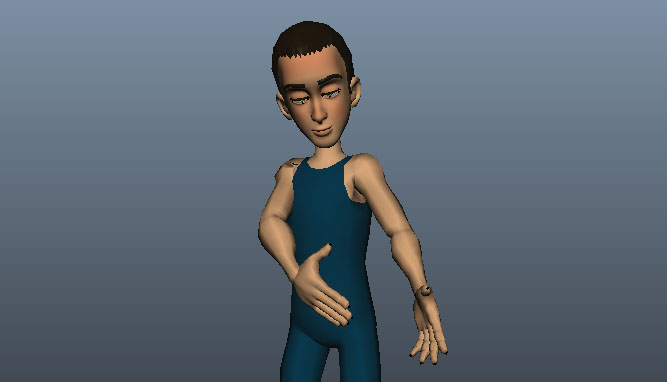
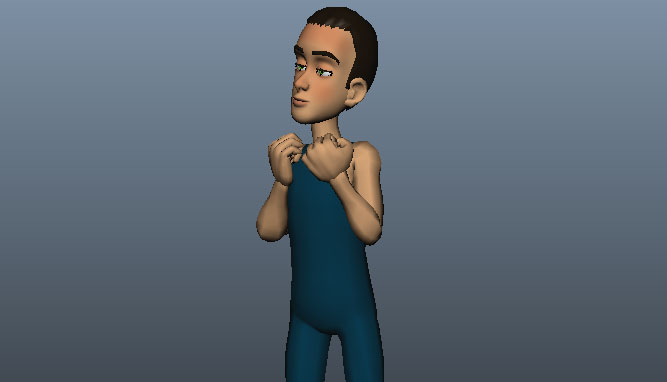
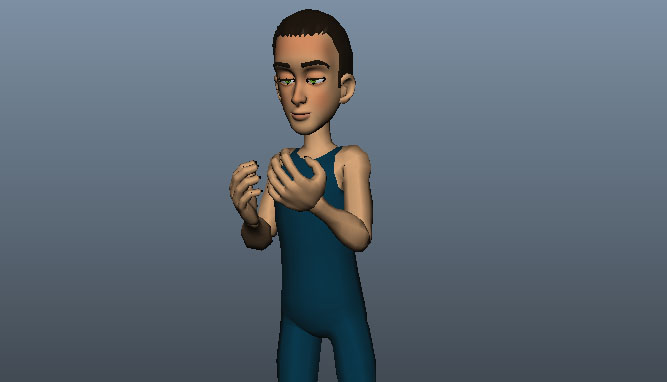
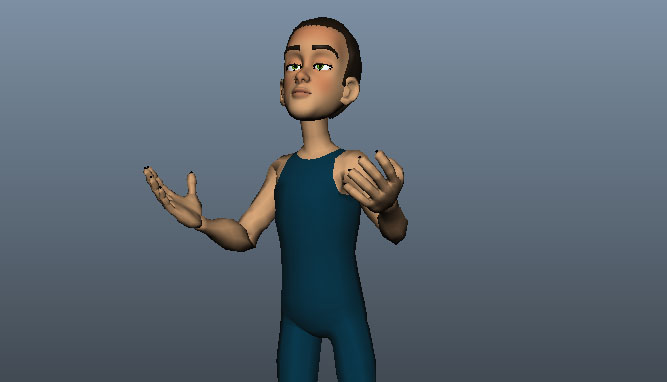
MAYA POSING
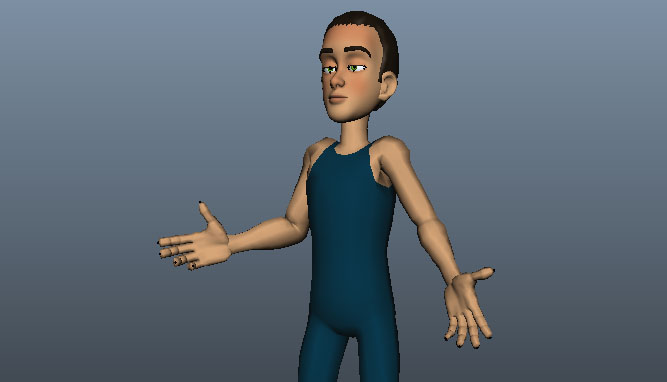
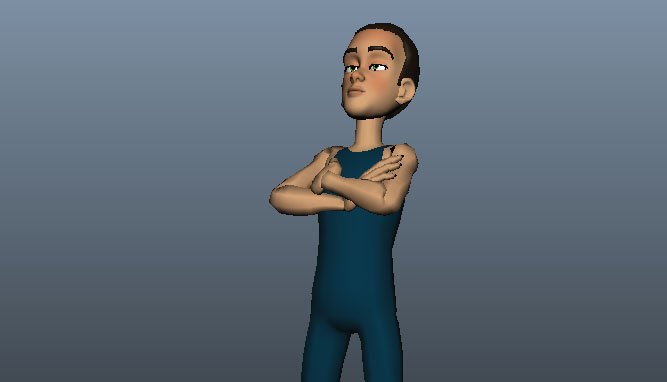
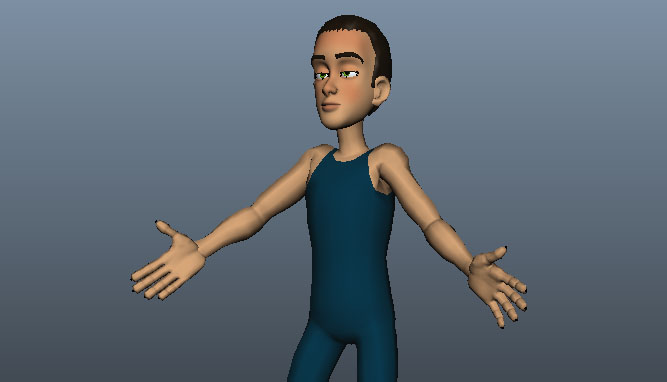
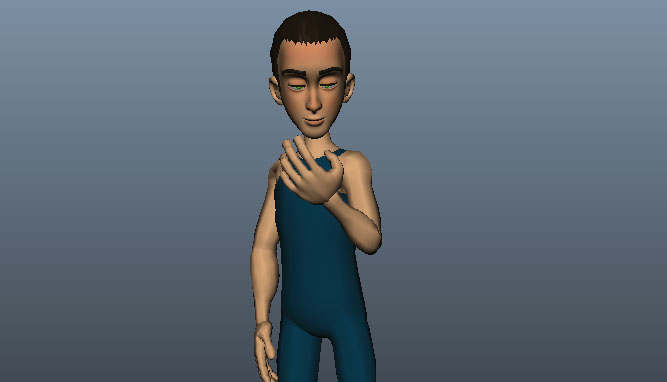
Here are some of the main poses. I kept them at all the same angle, because I just wanted to set the poses and get an idea of what they would look like on Maya. I may do a version focusing on just facial expressions as I didn't manipulate the faces here. They are in order of the animatic. Thinking about it, I probably have used to many hand gestures on it though.
When we had the acting lessons, it did help quite a bit. I know there was a rule to try and avoid the 'W' pose, but I thought it looked appropriate. I will probably cut down on the gesturing and make my character use more minor movements. We learnt about the Laban technique. According to the technique, the movement of a character will be based on a few certain characteristics to make them more interesting. My character should be quite direct by the beginning, becoming a little more indirect by the end.
When we had the acting lessons, it did help quite a bit. I know there was a rule to try and avoid the 'W' pose, but I thought it looked appropriate. I will probably cut down on the gesturing and make my character use more minor movements. We learnt about the Laban technique. According to the technique, the movement of a character will be based on a few certain characteristics to make them more interesting. My character should be quite direct by the beginning, becoming a little more indirect by the end.


Character Animation References
|
I looked here at a video of Buzz and Woody for some good character animation reference. I really like how they move and how natural they seemed. Woody in particular is one of my favourite animated characters and I love his movement even if he is in one spot.
|
I tried not to watch this scene too many times. I wanted the audio to influence my animation, rather that the actual scene it came from. However it was good to see expressions and bits of movement from this scene.
|
I thought I'd look at other people's character animations and I liked this one quite a bit. It was a really fun mix of character animation and movement.
|
Acting lessons
During one of our life drawing classes, we had an acting lesson that taught us about acting and specifically two certain techniques, method acting (Stanislavski: Inside -Out) and Laban (Outside - In).
Stanislavki method involved really getting to know the part you are working on. You must act in reaction to all the things that make up the scene and how the character is as a personality. It is the type of acting where you really delve into the mindset of the character and study the character in depth. The subtext of a dialogue is very important so should be thought through.
Laban method focuses more on the movement of the body and how each movement creates a different effect. THere are four components to the method; Body, Effort, Space and Shape. It is best to understand all these elements for effective character movement.
This acting lesson really drilled in the message that movement is key. Whether a small, natural movement or a grandiose and exaggerated one, each move has a meaning.
Finalising
After our formatives, I decided I should cut down my piece to a doable 24 seconds. This is much better than the original 40 or so seconds and gives me more confidence in completing a good animated piece.
I decided to involve more characters and shots of characters not speaking (the two girls) and various close ups to mid shots of the main character. I added the two girls to show reaction to what is being said. This is in reflection to the actual '17 Again' scene where people were a little confused as he spoke. If I went on for longer I would have added shots of the girls changing their expressions to look more 'in love' at the caring words.
Here is the dialogue:
No. No, you know what? He's right. He's right.
I don't need one.
You know why? You know why I don't need one?
Because there's no one that I'm in love with.
It's called making love isn't it? I... I
Maybe I'm old fashioned, but I - I think that means that you do it with someone you love.
And prefereably when you're married.
You know when you're ready to take that love and turn it into...
A baby.
After doing the first storyboard and then doing Maya tests I felt I was better off just doing basic storyboard shots of what the character pose than add faces. It was hard doing the face because it felt off. I felt it was easier to get the movement of the character on Maya done first, then fit in the expressions to correspond to the dialogue and movement. I also realise that I don't tend to follow expressions in storyboards, only movements.
I still kept quite bit of things from my first storyboard and animatic, but had to change a great deal as I had a shorter piece now that starts much earlier than the piece of dialogue I had at the start.
Below I did a mouth to dialogue test. I think I find it really difficult to draw the expressions for dialogue and has been a weak point of mine.
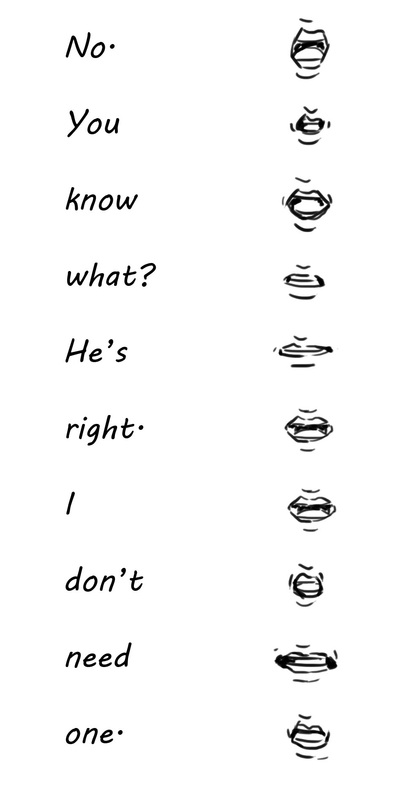
I actually found it much easier to hold my finger above my mouth and feel the movement of my mouth as I say the words This gave me a better impression as to what to move when doing any lipsyncing before. I will apply this to my actual animation as I used it for the 'Phil' test.
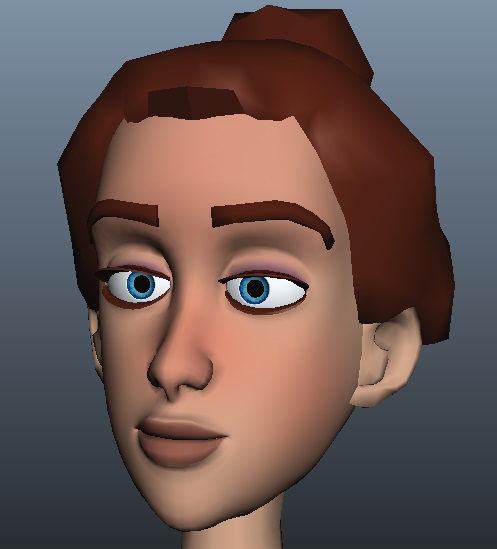
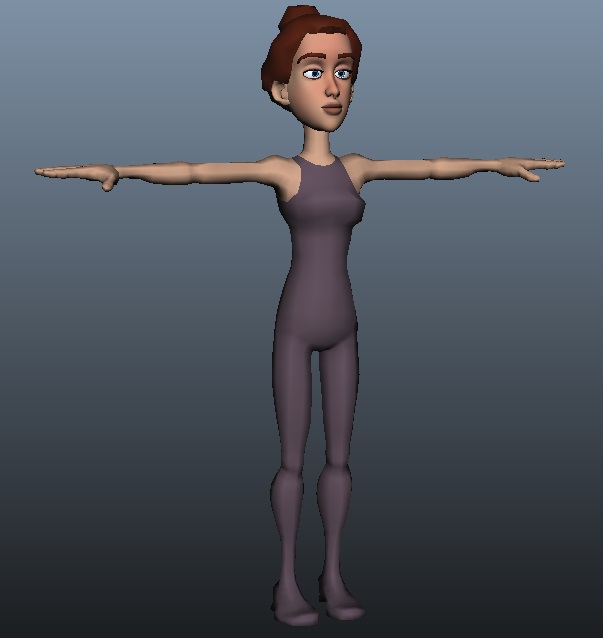
Below are the extra girls I added in. I didn't spend too much time worrying about their bodies as I knew they weren't to be in the shots for very long. However, I did make sure they had vastly different hair colours so one could differentiate them.
Below are the extra girls I added in. I didn't spend too much time worrying about their bodies as I knew they weren't to be in the shots for very long. However, I did make sure they had vastly different hair colours so one could differentiate them.
Tests
Below are a series of early tests I did as I did my animation. I preferred going into the animation rather than blocking as blocking didn't work out for me. I instead focused on body first, then did the lipsync and facial expressions.
|
Above you can see the movement of the body without the lipsync or any facial movement.
|
I added the facial movement in so it looks much better as a piece.
|
Here is a close up of the animated lipsync I did for the early part of the scene.
|
I actually had a bit of a problem with my first Maya file of my final animation so I had to start all over again when I realised this. I felt like crying, but luckily I still had quite a bit of time left so it wasn't impossible to start again!
Render test
Here I did a render test to see how everything would look. After doing the test I realised how bright the lights were so I had to change the lighting to make it less intense.
More tests
|
Above is another test I did of the end part of my animation. Here I was focusing more on the movement and matching it with the audio. I hadn't worked on the lipsync by this point.
|
Here is another playblast of the scene to the left. This has lipsync and facial animation in this. I also slightly changed the camera angle and I thought a straight on view looked too awkward.
|
Cameras
As above, the different shots weren't exactly placed as I hadn't created specific cameras. I did follow my storyboard above as much as I could, but I didn't aim for any fancy camera angles as it was the character movement itself that was important. Below, I broke down the different cameras I used and how I rendered it. It might be confusing, but it helped me when finally rendering.
Camera 1 : 0 - 32
Camera 3 : 33 - 149
Camera 2 : 150 -241
Camera 4 : 242 - 282
Camera 5 : 283 -326
Camera 7 : 327 -393
Camera 6 : 394 - 580
In total there were 580 frames. At the start there were up to 900 frames, but when I cut it down to 24 seconds, it became a better 580 or so frames.
Camera 1 : 0 - 32
Camera 3 : 33 - 149
Camera 2 : 150 -241
Camera 4 : 242 - 282
Camera 5 : 283 -326
Camera 7 : 327 -393
Camera 6 : 394 - 580
In total there were 580 frames. At the start there were up to 900 frames, but when I cut it down to 24 seconds, it became a better 580 or so frames.
Premiere Pro and Rendering
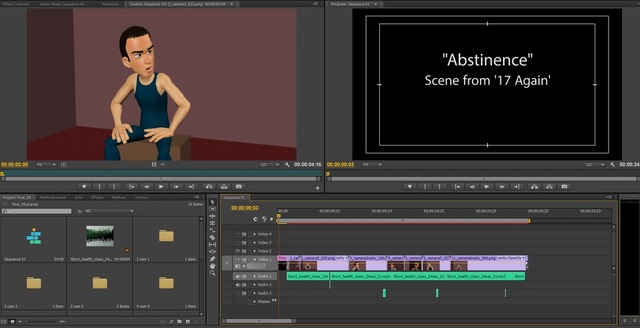
When it came to editing and piecing my images together, I did at first use After Effects because the tiff files were not able to be read on Premiere Pro. However, after advice from a fellow peer, I switched to using PNG files which were supported on premiere pro.
I hadn't used much of premierepro whereas I knew more about editing on After Effects. I still managed to learn the basics of Premiere Pro and managed to chop down my audio and video as well as add a simple fade in and out.
I hadn't used much of premierepro whereas I knew more about editing on After Effects. I still managed to learn the basics of Premiere Pro and managed to chop down my audio and video as well as add a simple fade in and out.
Above are some snapshots of the final rendered piece. Below you can find that actual animation.
Final Piece
Below is my final piece for Character Performance.
Evaluation
The whole project was definitely an interesting and difficult experience. It was challenging but fun at the same time. I really enjoyed playing around with the Morpheus rig and lipsyncing is fun, but slightly frustrating. Even when I knew how the mouth should look, sometimes when I morphed the mouth area of my character, it just looked off and awkward.
I think in the end my animation was successful and also a failure. I thought there were good moments of animation, but there were sloppy moments as well. There were things I learnt by the end of the project that I wish I knew earlier. For example, there were always little mistakes that I never realised in Maya that showed up when I rendered and had already put into premiere. This meant I had to go back and adjust and render all over again. It was minute things like a tilt of a head or the twitch of an eye. I wish I realised just how noticeable a small mistake could be. This also may have been due to the fact I had been looking at my piece for days now.
One thing that I really had to adjust was the audio. When I imported everything into Premiere Pro, the audio and visuals weren't syncing. I had a bit of a panic, but then got straight to it and chopped up bits of the audio, maybe like 1 second worth of audio just so things could sync better.
When I watch my animation over I am proud that I made it when I knew nothing about Maya or how to animate less than a year ago. However, I watch it and realise just how much I have to work on my skills. I don't think I exaggerated my character enough as I think I went a little too much for the subtle and natural look, but that isn't the point of animation. Animation allows you to go over the top. I think if I were to do this project all over again I would have gone a bit more exaggerated with the movements. It looked fine as a storyboard, but not when put as an animation.
If I had more time I also would have added more shots of all three of the characters in the piece. I had to minimise this to only one quick scene at the start due to time restrictions and I needed to focus on one character.
During the holidays I definitely hope to do some more animating with the Morpheus rig. It is a great rig for beginners and the experience of this project has taught me more about animating, most definitely!
Please click below for more work for Character Animation/Performance project including Morpheus Rig tests and Animation History.
